Packing for Australia’s wild climate swings in one bag isn’t about the items you pack, but the strategic, high-performance system you create.
- Success lies in choosing multi-purpose gear engineered for specific Australian threats like extreme UV, invasive dust, and sudden humidity.
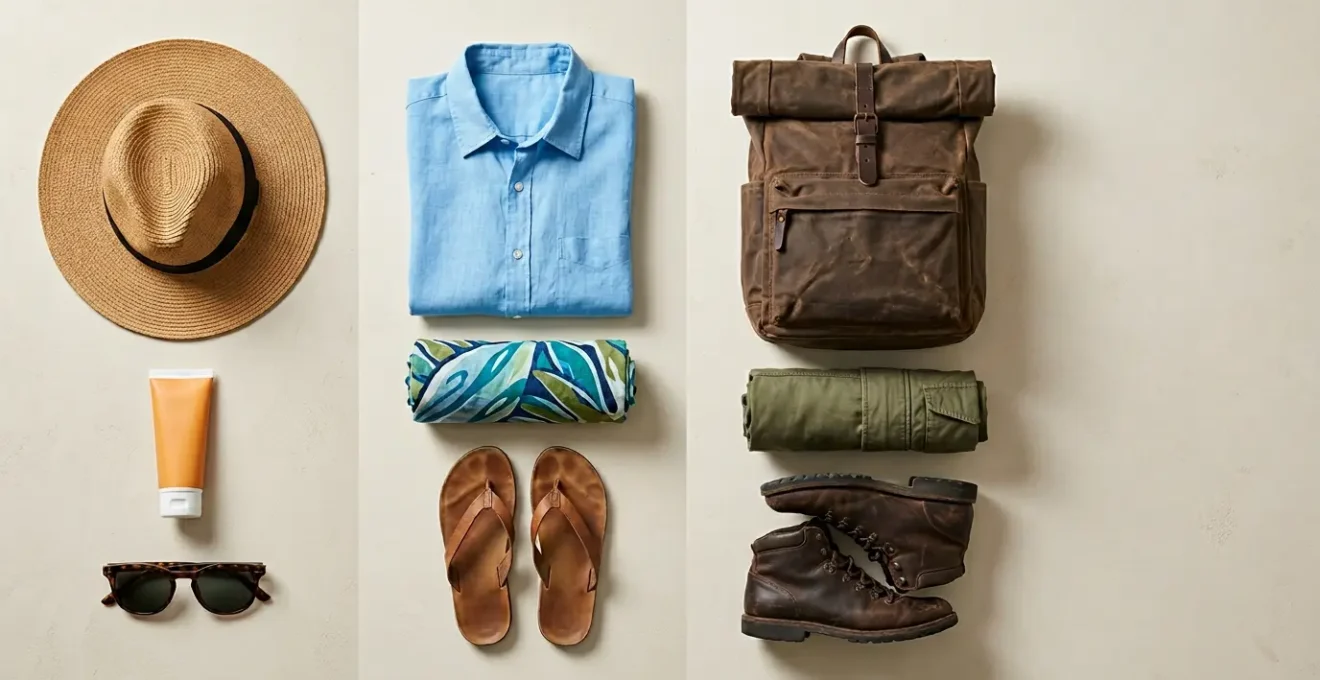
- A minimalist « two-shoe system » and embracing local solutions like the ‘rashie’ are non-negotiable for efficiency and comfort.
Recommendation: Ditch generic packing lists. Instead, build a compact toolkit of performance layers and environmental armour to thrive in every climate from Melbourne’s chill to the Outback’s heat.
Packing for a trip that spans Melbourne’s unpredictable chill, Uluru’s searing desert heat, and Cairns’ tropical humidity feels like an impossible puzzle. The conventional wisdom? « Pack layers. » This advice, while well-intentioned, is dangerously vague for Australia. It’s the fastest way to end up with a bursting, overweight suitcase full of items that are ‘almost’ right, leaving you ill-equipped for the country’s unique environmental challenges.
Most travellers make the same mistakes: they underestimate the sun, they bring the wrong footwear, and they pack for three separate holidays instead of one cohesive journey. They end up with heavy hiking boots that are overkill, cotton clothes that never dry in the tropics, and a camera lens fogged by humidity or ruined by fine red dust. The real challenge isn’t just the weather; it’s the airline baggage scale. Every single item must justify its weight and space.
But what if the key wasn’t about cramming more options in, but about adopting a minimalist, high-performance strategy? The secret, known to seasoned travellers and locals, is to stop thinking about a ‘packing list’ and start thinking about a ‘packing system’. It’s a curated toolkit where each piece serves multiple functions and is specifically chosen to defeat an Australian environmental threat. This isn’t just about clothes; it’s about a mindset.
This guide will deconstruct that system. We will move beyond platitudes and dive into the science of why Australian conditions demand specific gear. We’ll cover the non-negotiable footwear system, the truth about sun protection, and how to safeguard your gear and your health from the continent’s more aggressive side. Prepare to pack smarter, lighter, and more effectively than ever before.
To navigate this complex challenge, this article breaks down the essential strategies into a clear roadmap. The following sections will guide you through each critical aspect of building your perfect, minimalist Australian travel kit.
Summary: Packing for Australia: A Minimalist’s Guide to Three Climates
- Why Is Australian Sun So Much Stronger Than in the Mediterranean?
- SPF 50+ Is Not Enough: Why You Need a Rash Vest for Midday Sun?
- Thongs or Walking Boots: What Footwear Covers City, Beach, and Bush?
- Bush Fly Season: Why Is a Head Net More Effective Than Repellent?
- How to Protect Camera Gear from Red Dust and Tropical Humidity?
- Hay Fever in Spring: Which Native Plants Trigger the Worst Symptoms?
- When to See the Staircase to the Moon: Timing Your Broome Visit
- Staying Fit on Holiday: Where to Find Free Outdoor Gyms in Sydney?
Why Is Australian Sun So Much Stronger Than in the Mediterranean?
The first rule of packing for Australia is respecting its sun. It’s not just a feeling; the sun here is scientifically more intense than in Europe or North America. This isn’t just about heat, but about the sheer destructive power of its ultraviolet (UV) radiation. Understanding the ‘why’ is crucial to building your environmental armour and avoiding a trip-ruining sunburn or long-term skin damage. Two primary factors create this ‘double whammy’ effect.
Firstly, the Earth’s orbit is elliptical, not perfectly circular. During the Southern Hemisphere’s summer (December to February), the Earth is closer to the sun. This proximity alone results in an additional 7% solar UV intensity compared to summer in the Northern Hemisphere. Secondly, Australia’s atmosphere is cleaner than in many parts of the world. With less pollution and haze to scatter the UV rays, more of that direct, intense radiation reaches the ground.
Case Study: The Orbital & Atmospheric Double Whammy
The combined effect is staggering. An analysis of atmospheric conditions reveals that during summer, Australians can be exposed to up to 15% more UV radiation than Europeans. This amplified intensity means that incidental exposure—things you wouldn’t think twice about in the Mediterranean, like driving with the window down or sitting by a bright café window—carries a significantly higher risk. It transforms benign activities into moments of high UV exposure, making a comprehensive sun protection strategy non-negotiable.
This means your standard « hat and sunscreen » approach is insufficient. You need a complete sun-safe ecosystem. Think of sunscreen not as your first line of defence, but as a backup for the small areas your primary armour—physical barriers like UPF-rated clothing and a wide-brimmed hat—doesn’t cover. This is the fundamental principle of staying safe under the Australian sun.
SPF 50+ Is Not Enough: Why You Need a Rash Vest for Midday Sun?
Relying solely on SPF 50+ sunscreen in Australia is a rookie mistake, especially at the beach. In real-world conditions, sunscreen is a failing strategy. Most people don’t apply the required « shot glass » amount for full body coverage, it rubs off on towels, gets washed away in the water, and is often not reapplied frequently enough. Add the ‘amplification effect’ of UV rays reflecting off water and sand, and you have a recipe for severe sunburn, even when you think you’re protected. This is where a crucial piece of local wisdom comes in: the ‘rashie’.
A rash vest, or « rashie » as it’s universally known in Australia, is a lightweight, stretchy top made of materials like lycra or nylon with a certified Ultraviolet Protection Factor (UPF). A UPF 50+ rashie blocks over 98% of UV rays. Unlike sunscreen, its protection doesn’t degrade. It offers a « set and forget » solution for your entire torso, the area most exposed to the sun while swimming, snorkelling, or paddleboarding. It is the single most effective piece of environmental armour you can pack for the Australian coast.
Case Study: The Practical Failure of Sunscreen vs. The ‘Rashie’
The practical failures of sunscreen are well-documented. Between insufficient application and rapid degradation in water, its real-world effectiveness is often a fraction of its lab-tested rating. A rash vest, however, provides consistent, reliable protection for your core. It’s a one-time purchase that saves a significant amount of money on sunscreen over a trip. Crucially, for environmentally-conscious travellers, it is the most guaranteed reef-safe option for snorkelling on fragile ecosystems like the Great Barrier Reef or Ningaloo Reef, eliminating the risk of harmful chemicals washing into the ocean.
Your Action Plan: Deploying Physical Sun Barriers
- Follow the « Slip, Slop, Slap, Seek, Slide » rule: Whenever the UV Index is 3 or above (which is most days in most of Australia), Slip on protective clothing, Slop on broad-spectrum SPF 50+ sunscreen, Slap on a broad-brimmed hat, Seek shade, and Slide on sunglasses.
- Primary Beach Defence: For any water activities between the peak UV hours of 10 am and 3 pm, wear a UPF 50+ rash vest as your main form of torso protection.
- Extended Outdoor Protection: For activities like hiking, fishing, or long sightseeing days, a lightweight, long-sleeved UPF-rated shirt is a smarter choice than constantly reapplying sunscreen to your arms.
- Check the Index Daily: Use a weather app to check the local UV Index. An extreme rating of 11+ is common, and it’s a critical data point for planning your day safely.
- Urban Exposure Adds Up: Don’t underestimate incidental sun exposure while walking through cities. UPF clothing is just as valuable for city sightseeing as it is for the beach, as confirmed by national health bodies like the Australian Cancer Council.
Embracing the rashie isn’t just about sun safety; it’s about adopting a local mindset. It’s a practical, efficient, and ultimately superior solution to a serious environmental threat. It’s a perfect example of how minimalist packing is about choosing the single most effective item, not multiple mediocre ones.
Thongs or Walking Boots: What Footwear Covers City, Beach, and Bush?
Footwear is the foundation of your packing system and a common point of failure. The temptation is to pack for every eventuality: hiking boots for the bush, sandals for the beach, and sneakers for the city. This is a fast track to an overweight bag. The minimalist guru’s approach is the non-negotiable « Two-Shoe System ». This strategy provides maximum versatility and protection for every likely scenario in Australia with just two pairs of shoes.
The first, and most critical, is a pair of amphibious trail shoes. These are not heavy, waterproof hiking boots, which are overkill and far too hot for most Australian conditions. Instead, think of closed-toe, quick-drying shoes with excellent grip, like the Salomon Techamphibian or Keen Newport. They are designed to be worn in water, making them perfect for rocky beaches or creek crossings. Their closed-toe design offers crucial protection from sharp grasses, biting ants, and snakes in the bush—dangers that make wearing ‘thongs’ (flip-flops) in the wild an incredibly risky choice. They are the ultimate utility player in your kit.
Your second pair should be versatile urban sneakers. The key here is material. Avoid classic leather (too hot, slow to dry) and canvas (stays wet, gets filthy). Opt for modern sneakers made from breathable, quick-drying materials like merino wool or synthetic mesh. These are comfortable enough for a full day of exploring Melbourne’s laneways, stylish enough for a casual dinner in Cairns, and can be paired with merino wool socks for excellent temperature regulation and anti-odour properties. This pair handles all your urban and casual needs.
A final, critical point is biosecurity. Australia has some of the strictest biosecurity laws in the world. To prevent the introduction of foreign soil-borne pathogens, official government guidelines state that all footwear used in rural areas must be thoroughly cleaned and free of any soil or plant matter before you arrive and declare it on your incoming passenger card. Arriving with clean shoes is not just good practice; it’s the law.
Bush Fly Season: Why Is a Head Net More Effective Than Repellent?
In the vast, sun-drenched landscapes of the Red Centre and the Western Australian outback, you’ll encounter an environmental challenge that drives visitors to distraction: the bush fly. These are not biting insects like mosquitoes. Their goal is not your blood, but the protein and moisture found in your eyes, nose, and mouth. This fundamental difference in their motivation is why your typical chemical repellent is shockingly ineffective against them.
Flies are less deterred by chemicals like DEET because their drive to find moisture in an arid environment is overwhelming. They will swarm your face relentlessly, forcing you to adopt the constant, frantic hand-waving motion known as the « Aussie Salute. » While it provides momentary relief, it’s exhausting and makes activities like photography, hiking, or even just having a conversation nearly impossible. The chemical-based approach simply fails against the sheer persistence of these insects.
The superior solution is a physical barrier: a fly head net. This simple, inexpensive piece of mesh is the single most valuable item you can pack for the outback. It’s a perfect example of minimalist-guru thinking: a low-tech, lightweight item that solves a high-impact problem completely. It liberates your hands and restores your sanity, allowing you to actually enjoy the magnificent landscapes without a personal cloud of flies.
However, there’s a right way and a wrong way to use it. The key to comfort and visibility is to wear the head net over a wide-brimmed hat. This keeps the mesh away from your face, preventing it from resting against your eyelashes or mouth, which can be just as annoying as the flies themselves. Not all of Australia has a fly problem; they are most prevalent in the central and western outback regions during the warmer months, typically from September to April. But if your itinerary includes Uluru, Kata Tjuta, or the WA coast during this time, a head net is not an optional extra—it is an essential piece of environmental armour.
How to Protect Camera Gear from Red Dust and Tropical Humidity?
For photographers and anyone travelling with expensive electronics, Australia presents a dual threat: the fine, invasive red dust of the Outback and the lens-destroying humidity of the tropics. A single strategy won’t work; you need a two-pronged approach to your « environmental armour » to ensure your gear survives the trip. Failure to prepare can lead to costly repairs or, worse, missed photo opportunities.
The first threat is humidity, particularly potent in places like Cairns and the Daintree Rainforest. When you move your cool, air-conditioned camera into the hot, humid outdoors, condensation can instantly form on and, more dangerously, *inside* your lens and camera body. This moisture can short electronics and promote the growth of fungus on your lens elements, which can permanently etch the glass. The solution is acclimatisation. Always leave your camera gear inside its sealed bag for 30-60 minutes after moving between different temperature environments. This allows the equipment to warm up gradually, preventing condensation from forming.
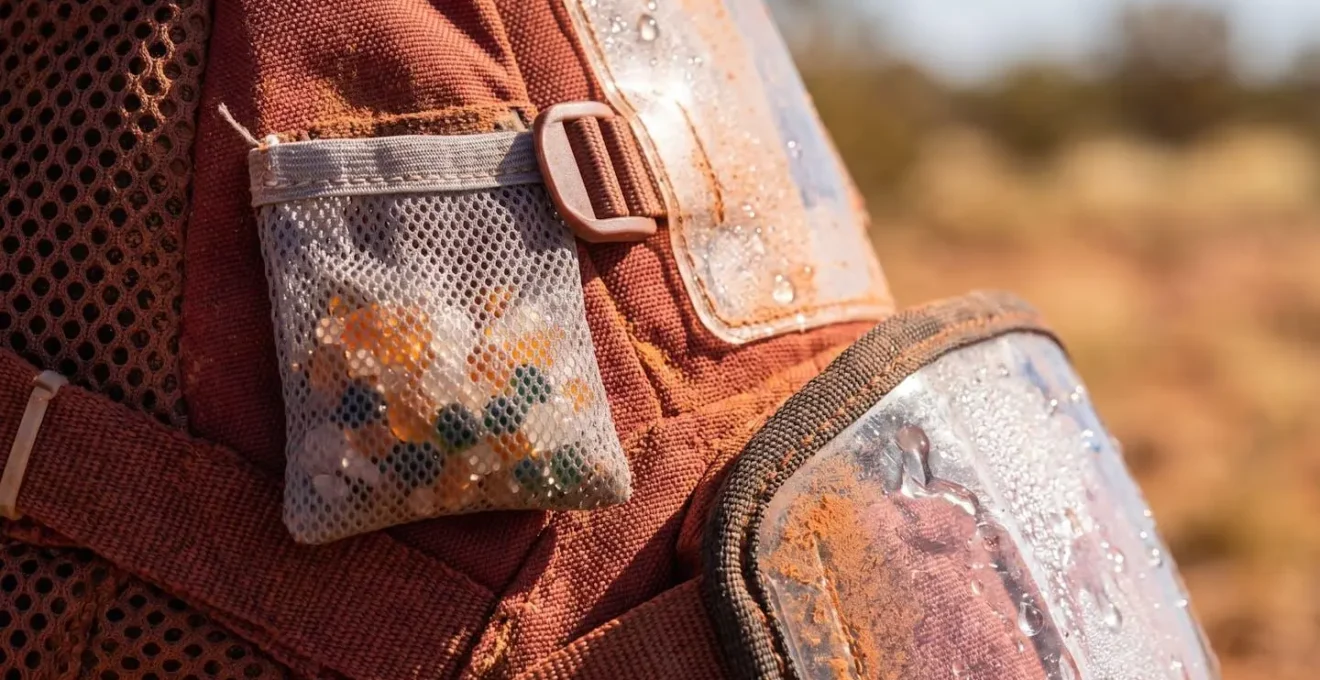
The second threat is dust. The iconic red dust of the Red Centre is finer than sand and gets into everything. It can work its way into lens barrels, focus rings, and sensor chambers, causing grinding, scratching, and spots on your images. The best defence is a dedicated rain/dust cover, which acts as a protective sleeve for your camera and lens while shooting. For an ultra-lightweight hack, a simple hotel shower cap can be stretched over the lens when you’re not actively shooting. Inside your bag, using rechargeable desiccant packs is critical to manage moisture, while a rocket blower (never compressed air, which can force dust deeper) is essential for field cleaning.
- Acclimatisation Protocol: When moving from an air-conditioned car or hotel room to the humid outdoors, leave your camera in its sealed bag for at least 30 minutes to prevent internal condensation.
- Humidity Management: Use rechargeable desiccant canisters or silica gel packs inside your camera bag. Aim to maintain a stable humidity level between 40-50% to stop fungus growth.
- Dust Barriers: Use a dedicated dust cover while shooting in places like Uluru. When not in use, keep lenses capped and consider the ‘shower cap hack’ for extra protection.
- Sealed Cleaning Kit: Pack a rocket blower, a lens pen, and several microfiber cloths, each stored in its own small ziplock bag to prevent contamination from the pervasive red dust.
Hay Fever in Spring: Which Native Plants Trigger the Worst Symptoms?
For travellers prone to hay fever, arriving in Australia during spring (September to November) can be a miserable experience. While many assume the beautiful, brightly coloured native flowers are the culprits, the primary trigger is often invisible: wind-borne pollen from grasses, particularly ryegrass. This is especially problematic in the temperate regions of southeastern Australia, including Melbourne and Canberra. But the risk goes beyond a simple runny nose and itchy eyes.
Australia is home to a uniquely severe and dangerous phenomenon known as thunderstorm asthma. It occurs when a specific set of weather conditions combine, primarily during the spring ryegrass pollen season. During a thunderstorm, high moisture levels in the air cause airborne pollen grains to rupture into hundreds of tiny starch granules. These particles are small enough to bypass the body’s normal filtration systems in the nose and upper airways, penetrating deep into the lungs.
Case Study: The 2016 Melbourne Thunderstorm Asthma Event
This phenomenon can trigger sudden, severe, and widespread asthma attacks, even in people who have only ever experienced mild hay fever and have no history of asthma. The most infamous event occurred in Melbourne in November 2016, leading to over 10,000 emergency department presentations and several fatalities. The incident highlighted that anyone with a springtime ryegrass allergy is potentially at risk. This is a uniquely Australian health risk that standard travel advice completely overlooks, demonstrating the need for location-specific preparation.
Therefore, if you are travelling to southeastern Australia in spring and suffer from hay fever, your preparation must go beyond simply packing antihistamine tablets. It is crucial to monitor local pollen counts via dedicated apps (like ‘Melbourne Pollen’) and be aware of thunderstorm warnings on high-pollen days. On such days, the official advice is to stay indoors with windows and doors closed before and during the storm. For those with a known pollen allergy, discussing a proactive management plan with a doctor before travelling is a vital part of your trip preparation.
When to See the Staircase to the Moon: Timing Your Broome Visit
Beyond protecting yourself from Australia’s environmental threats, a well-planned trip is also about timing your visit to witness its unique natural wonders. One of the most magical is the « Staircase to the Moon » in Broome, Western Australia. This natural illusion occurs when a full moon rises over the exposed mudflats of Roebuck Bay at an extremely low tide, creating the visual effect of a staircase leading up to the moon. However, witnessing it is not as simple as just being in Broome during a full moon.
Achieving the perfect viewing requires a « trifecta » of timing factors to align perfectly. Firstly, the phenomenon only happens for 2-3 days each month between March and October. You must consult the official Staircase dates published by the local tourism authority. Secondly, the tide must be exceptionally low—1 to 2 metres or less—to expose the vast, rippled mudflats that create the « steps » of the staircase. A full moon with a high tide will produce no effect. You need to cross-reference the official dates with local tide charts.
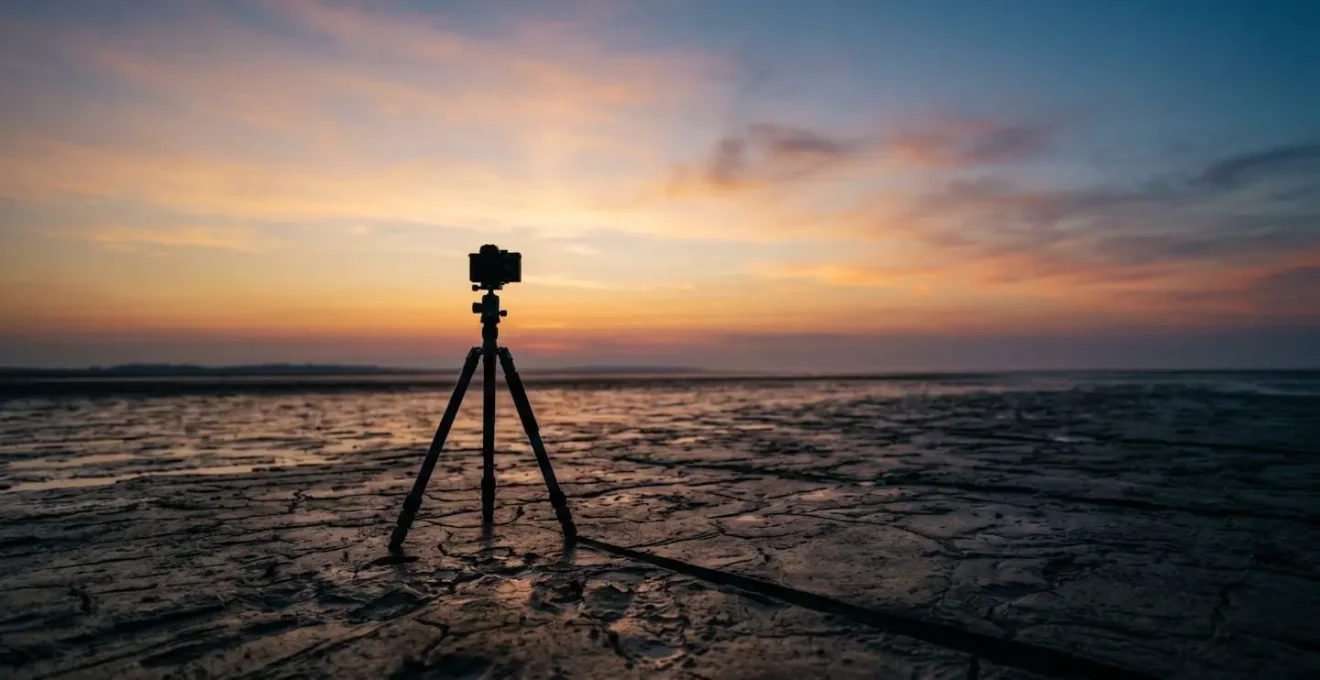
The final factor is the time of moonrise. The most dramatic and photogenic effect occurs when the moon rises shortly after sunset. This timing provides the best light, with the deep colours of dusk creating a stunning contrast for the golden light of the rising moon on the mudflats. If the moon rises in complete darkness, the illusion is significantly diminished.
Because Broome is a relatively small town and this event is world-renowned, planning is everything. Accommodation and rental cars for the official Staircase dates can sell out 6-9 months in advance. This is not a spontaneous side-trip. It requires the same level of strategic, long-range planning as the rest of your minimalist packing system. If you want to witness this marvel, booking early is not just recommended; it is absolutely essential to secure your spot.
Key takeaways
- Adopt a system, not a list. Your gear must be multi-purpose and chosen to defeat specific Australian threats like UV, dust, and humidity.
- Physical barriers are superior. A UPF 50+ ‘rashie’ and a fly head net are more effective and efficient than sunscreen and chemical repellents in their respective environments.
- The « Two-Shoe System » is non-negotiable. One pair of amphibious trail shoes and one pair of versatile urban sneakers will cover 99% of travel scenarios, saving critical weight and space.
Staying Fit on Holiday: Where to Find Free Outdoor Gyms in Sydney?
Living out of one suitcase doesn’t mean abandoning your fitness routine. In fact, Australia’s outdoor culture makes it one of the easiest places to stay active without a gym membership. Sydney, in particular, is a natural playground, offering world-class free « gyms » if you know where to look. The key is to leverage the environment and pack a tiny, high-impact micro-workout kit.
Sydney’s coastline and parks are your primary fitness assets. The iconic 6km Bondi to Coogee coastal walk is a brilliant cardio workout with stunning views and plenty of stairs for interval training. For a bigger challenge, the 10km Spit to Manly walk offers a more rugged trail experience. For stair-running enthusiasts, the McElhone Stairs in Woolloomooloo are legendary. Many of the city’s famous ocean pools, like Bronte Baths or Mahon Pool, are perfect for swimming laps in a spectacular setting, often for free or a very small fee.
For those who prefer bodyweight or calisthenics training, Sydney is dotted with free outdoor gyms. These council-provided facilities typically have pull-up bars, dip stations, and sit-up benches. The best way to find them is to simply search « outdoor gym » or « calisthenics park » in Google Maps for your local area. Local council websites, such as the City of Sydney or Waverley Council, also have directories of their parks and recreational facilities.
The final piece of the puzzle is your micro-workout kit, which should take up minimal space in your single suitcase. All you need are three things: one resistance band for strength training, your dual-purpose running/walking shoes (the urban sneaker from your « Two-Shoe System »), and activewear made from merino wool. Merino is a miracle material for the minimalist traveller; it regulates temperature, wicks moisture, and is naturally anti-odour, meaning you can wear it for multiple workouts before it needs washing, a crucial feature when living out of a single bag.
By shifting your mindset from a simple packing list to a strategic, multi-purpose system, you can confidently conquer Australia’s diverse climates. Now, the next step is to apply these principles and start building your own high-performance travel kit.